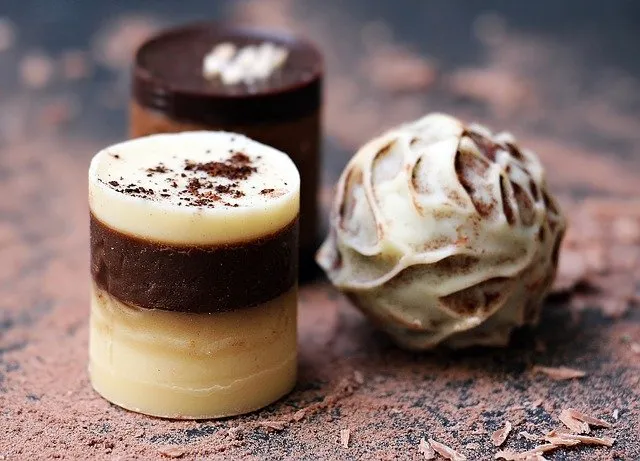
Chocolates, truffles, easy to make, delicious to eat.
Indulge in the rich, velvety world of homemade chocolates and truffles. Perfectly easy to make and irresistibly delicious, these treats are sure to satisfy your sweetest cravings.

Indulge in the rich, velvety world of homemade chocolates and truffles. Perfectly easy to make and irresistibly delicious, these treats are sure to satisfy your sweetest cravings.
Chocolate is made from cacao beans which are the seeds of the cacao plant.
Sweet chocolate is mostly sold today and is a combination of cocoa solids, cocoa butter (or other fats), and sugar.
The strongest flavoured chocolate is dark chocolate which has less milk products added. Milk chocolate contains milk powder or condensed milk. While white chocolate contains cocoa butter, sugar, and milk, but no cocoa solids.
The best chocolate is known as couverture.
Couverture is a very high quality chocolate which contains extra cocoa butter. The higher the percentage of cocoa butter included and combined with proper tempering, gives the chocolate more sheen and a crisper snap when broken.
Chocolate is like wine, the more you pay for it the better it is. Chocolate chip cookies, cakes, brownies and muffins, when made with best Belgian chocolate are fantastic, and well worth the extra expense!
‘Wonderful Chocolate’ is recognised as being the best loved flavour in the world.
Current research highlights interesting health benefits too. Chocolate contains a substance called Phenylethylamine which acts in a similar way to amphetamines – as a mood enhancer for depression? Chocolate also gives some cardiovascular benefits, helping to reduce platelet clumping. These ‘flavonoids’ within chocolate are also antioxidants which help destroy free radicals, (associated with disease and ageing.
Perhaps delicious chocolate IS good for you, or not, as it could be addictive too!
So, let’s consider the varieties of chocolate products available on the market.
Cocoa Block is processed cocoa mass which has been milled, ground and formed into a block.
This unsweetened bitter chocolate is used to cook with and will intensify the chocolate flavour. Care must be taken on how much you use though, as add too much and a bitter flavour will develop.
To use, take out 20% of the total chocolate from the recipe, and add 20% of bitter chocolate. If too strong use less. 20% will give a really enhanced chocolate flavour, much stronger than if your were to add cocoa powder instead.
Dark bitter chocolate is the most expensive of all couverture due to its high cocoa fat content, and low sugar.
Unsweetened Cocoa Powder is made by grinding up cocoa cakes. These are made by passing cocoa mass through an hydraulic press to make the cakes.
Recipes which contain a lot of fat and/or sugar, like chocolate brownies, benefit from the more intense flavour when cocoa is added.
Dutch processed cocoa powder is the very best. It must contain a minimum of 20% cocoa fat.
Cocoa Butter is pure cocoa fat. It has been hydraulically pressed from the Cocoa Mass.
This ‘Butter’ is used to make all chocolate couverture. The higher the amount of cocoa butter in chocolate, the better the chocolate.
White Chocolate is cocoa butter mixed with sugar and milk powder.
It has no cocoa solids therefore it is not really chocolate though it is thought of as chocolate.
It is actually sweetened, flavoured cocoa butter. Made up of 15% milk solids of which 3-4% must be milk fat, a minimum of 20% Cocoa Butter, and no more than 55% sugar.
Dark Chocolate is cocoa mass mixed with cocoa butter and sugar.
The percentage of cocoa butter added denotes the quality and strength of flavour of the chocolate, and the price!
Milk Chocolate is cocoa mass mixed with cocoa butter, milk powder and sugar.
It must contain at least 15% milk solids of which 3-4% should be milk fat. A total fat content of at least 25%, and no more than 50% sugar.
Coating Chocolate is not chocolate as it contains no cocoa butter. Other fats like vegetable oil are used to make it.
Coating chocolate does not require Tempering unlike Couverture. Neither does it have the fantastic flavour, and ‘snap’. However, it is much easier to store and use. You must therefore decide between cost, ease of use, and flavour as to whether you use it or not.
You can get this chocolate in three varieties – dark, milk and white.
It is best used to cover baked goods.
Chocolate Chips are ‘buttons’ of chocolate couverture which range in size from small to large.
They are mostly used in chocolate chip cookies and other confections which require chocolate chunks.
An additive has been put in which keeps them from loosing shape during baking. This makes them more difficult to melt. They are much more expensive than block chocolate so it seems wasteful to use these for tempering, use block chocolate instead. It can easily be grated or chopped up in a food processor.
However, for ease, commercial chocolate companies can purchase chocolate without the stabilizers. This makes it easier to temper the chocolate, no chopping/grating necessary. Not good for chocolate chip cookies though, as the chips melt – chocolate splodge cookies, LOL!
Carob, when dried and roasted has a slightly sweet taste and is similar to chocolate.
It is used as an ingredient in cakes and cookies. Carob is sometimes used as a chocolate substitute for those who are allergic to chocolate.
You can get it as a powder or in chip form.
Do be aware. Chocolate is poisonous to dogs! Carob makes a useful alternative ‘chocolate’ treat for them
The fat and sugar content of chocolate can range from:
Bittersweet 70% cocoa mass, 30% sugar,
Semisweet 60% cocoa mass, 40% sugar,
Sweet Dark 50% cocoa mass (of which a minimum of 20% should be cocoa butter) and 50% sugar.
Tempering chocolate will enhance the flavour, give it a crisp ‘snap’ when broken, and put a wonderful shine on the outside.
Un-tempered chocolate is dull, soft, and can have a ‘bloom’ covering it. The ‘bloom’ looks like a dusty residue on the chocolate. This is caused by the different cocoa fat crystals rising to the surface and setting unevenly. It is for this reason chocolate has to be tempered.
“Melt the chocolate” you say, “then, all the fats will blend together”? If it were just so simple! Let me try to explain the complexity of chocolate in a simple way.
There are six fats within chocolate shown in the chart below. The fats develop particular crystals during their different melting points. If one of the melted fat crystals develops through standing within the temperature range, the characteristics of the chocolate when cool and set will change.
For example, if the crystals of Alfa (Type 3) are allowed to form the chocolate will have a firm texture but will have a poor snap and will melt too easily. Not what you want on your confectionary. You want the hard snap from fat crystals of Beta (type V).
The Beta (type V) fat crystals give the best characteristics (flavour, snap and shine), and these fat crystals should be encouraged to form. Tempering chocolate properly achieves this.
Tempering is the art of producing a chocolate with great flavour, a ‘snap’ when bitten into, and a lovely shine. This is the magic of wonderful couverture.
The most straightforward way to temper couverture is to take the temperature high enough to melt all of the chocolate fats, and their corresponding fat crystals.
Then cool it down until below the lowest temperature where the fats melt, and crystals form. Stir, stir, stir, all the time during this process.
Then raise the temperature again slowly within the Beta (Type 5) temperature range until the most favourable temperature is achieved. The corresponding fat crystals will be predominant. Once this happens you get the required characteristics for fantastic chocolate.
It really is that easy. A chocolate thermometer initially would be a real asset. Although over time tempering becomes easier to gauge by eye, or by touching the chocolate on your lips to gauge the temperature, lips are highly sensitive to temperature differences.
Firstly though, please put effort into stirring the chocolate during the tempering process. This turns good chocolate into fantastic chocolate. It disperses everything evenly and helps melt the particles of chocolate added during the cooling process.
Chocolate tempering machines can be purchased which remove temperature issues, the machines are programmed to do this for you. They also have paddles which keep the chocolate moving in a circular motion all the time.
All that is missing from the explanation above are the temperatures, and of course, the science. That is where we go now.
| Melting Point | Name of Fat | Characteristics |
|---|---|---|
| 97˚F (36˚C) | Beta 1 (type VI) | Crystals start to form. Chocolate is hard and takes weeks to form. |
| 93˚F (34˚C) to 95˚F (35˚C) | Beta 2 (type V) | Crystals start to form. Chocolate is glossy, firm, has the best snap and melts near body temperature (37˚C). |
| 81˚F (27˚C) to 84˚F (29˚C) | Beta Prime 1 (type IV) | Crystals start to form. Chocolate will have a firm, good snap but still melts too easily. |
| 78˚F (26˚C) | Mixed (type III) | Crystals start to form. Chocolate will have a firm texture but will have a poor snap and will melt too easily. |
| 70˚F (21˚C) to 72˚F (22˚C) | Alpha (type II) | Crystals start to form. Chocolate will have a soft, crumbly texture and will melt too easily. |
| 61˚F (16˚C) to 67˚F (19˚C) | Beta Prime 2 (type I) | Crystals start to form. Chocolate will have a soft, crumbly texture and will melt too easily. |
The table here shows that Beta (type V) fats begin to melt at 93˚F (34˚C) which is when ‘good’ crystals begin to form. Better though to work slightly lower to ensure you don’t accidentally go higher and ‘break’ the temper. You have to start the whole process again if you do so!
Use 88 to 91˚F (31 to 32˚C) as the optimum temperature. Cool the chocolate down to 82˚F (28˚C), when the next fat crystals begin to form. Beta (type V) fat crystals will be the only fat crystals to develop within this temperature range, and dominate the chocolate.
So to recap.
You need to ensure that the chocolate’s temperature goes high enough to melt all the crystals, then allowed to cool sufficiently to hold it within the Beta (Type V) temperature range.
This is from 81˚F (27˚C) to 88 to 91˚F (31 to 32˚C).
Then raise the temperature gently from 81˚F (27˚C), up to 88 to 91˚F (31 to 32˚C).
This will ensure that only Beta (Type V) crystals can have formed. You will have tempered your chocolate.
Once the chocolate is tempered, when it cools into block form it will retain its temper. As long as you gently heat it to the Beta (type 5) temperature of 88 to 91˚F (31 to 32˚C), you will keep the temper.
Take the temperature above and you will have to start this process all over again as the next fat crystals will have begun to form. Your chocolate will have lost all of the wonderful characteristics gained through the tempering process.
So, how do you do it? It is easier to use an accurate thermometer when you first start out. You also need a double boiler (or saucepan with a bowl on top) to melt the chocolate, and a rubber spatula for stirring the chocolate.
Put in the chopped or grated chocolate and melt slowly until the temperature reaches at least 97˚F (36˚C) but no more than 115˚F to 119˚F (46˚C to 49˚C), dark chocolate. Lower for milk/white chocolate, 109˚F (43˚C), (or the chocolate will scorch).
Once the chocolate has melted the tempering process can begin.
By taking the chocolate to a temperature above the melting point of Beta (type VI), all fat crystals will have melted. As Beta (type V) are the fat crystals which give chocolate gloss, snap, flavour, and texture, the temperature must come down quickly to below where the next fat crystals form – 80˚F (27˚C). This is to melt any unwanted fat crystals.
Then raise the temperature slowly so as to keep within the optimum temperature where only the Beta (Type V) fat crystals form.
You could just keep stirring over iced water until the temperature reaches this lower temperature level but there are other ways. Either use the ‘tabling method’, ‘seeding method’ or, hold back a portion of chopped chocolate and add that. It is purely a personal preference which technique you use.
Temperature range for dark chocolate
Heat to: 115 -120 ˚F (46 – 49 ˚C)
Cool to: 80 ˚F (27 ˚F)
Raise the temperature slowly to: 86 – 88 ˚F (30 – 31 ˚C)
If using Milk or White chocolate work with a temperature range 2˚C lower than for dark chocolate. It is much more delicate and could burn easily due to the higher quantity of milk solids added to the cocoa mass, and cocoa butter.
So, how do you temper chocolate? You have an understanding of the science now. In practice though, how do you do it?
The four ways shown below tend to be the accepted techniques used in small scale production, or at home.
Commercially, machinery is used to melt the chocolate using accurate temperatures. Then the chocolates/biscuits/cakes are mechanically enrobed using a second machine.
For home production it is easier to use an accurate chocolate thermometer when you first start out. You also need a double boiler, or saucepan with a bowl on top, to melt the chocolate. Also a rubber spatula for stirring the chocolate during the melting process.
There are four different ways to cool the chocolate down:
Firstly, the heating method for all tempering techniques.
Prepare the block chocolate ready for tempering. Either cut into chunks and pass through a grater, or, chop into even size shards. The more even the size achieved, the quicker chocolate will melt.
Put 2/3 of the prepared chopped or grated chocolate into the top part of your Bain Marie (double boiler). Set the rest of the chocolate on one side to use shortly. Heat the water in the lower part until the water is slowly rolling. The chocolate must melt slowly until the temperature reaches 115˚F (46˚C), but no more than 120˚F (49˚C), if dark chocolate. If milk or white chocolate the temperature must be a little lower – 111˚F (44˚C).
Once the chocolate has melted the tempering process can begin.
Add the ‘set aside’ grated/chopped chocolate to the hot chocolate. Carefully stir the two together until well combined with no solid particles of chocolate remaining.
Check the temperature which has to be at or just below 28˚C. Keep stirring until this temperature is reached. Now follow the instructions below for raising the chocolate’s temperature. This is the same technique for all of the cooling methods highlighted here.
The ‘tabling’ method for dark chocolate involves melting all the chocolate to 115˚F (46˚C), but no more than 120˚F (49˚C), if dark chocolate. If milk or white chocolate the temperature must be a little lower – 111˚F (44˚C). If you take the chocolate much higher it will scorch.
Take the chocolate off the heat and pour 1/3 of this melted chocolate onto a clean surface. Be careful not to drip any of the water from the pan’s underside which was in contact with the water.
With a spatula move the chocolate on the surface from side to side, scraping the cooling edges into the centre. When the chocolate becomes much thicker and cooler (fudge like), but not quite set, scrape it all back into the ‘hot’ chocolate in the bowl.
Carefully stir the two together until well combined. Check the temperature which has to be at or just below 82˚F (28˚C). Keep stirring until this temperature is reached. Now follow the instructions below for raising the chocolate’s temperature. This is the same technique for all of the cooling methods highlighted here.
As with all of the tempering processes, temperatures are the same. This includes the Seeding Method of tempering chocolate. For dark chocolate melt all of the chocolate to 115˚F (46˚C), but no more than 120˚F (49˚C). If milk or white chocolate the temperature must be a little lower – 111˚F (44˚C). Highlighting here though dark chocolate. If you take the temperature much higher than 120˚F (49˚C), the chocolate will scorch.
Once at this temperature you add a large chunk of tempered chocolate to the melted chocolate and stir carefully but continuously until the chocolate reaches 82˚F (28˚C).
All that is left to do is remove the remaining chunk of tempered chocolate. Then follow the technique below to raise the chocolate’s temperature, to temper it.
The last method shown here is again very simple. Just place your bowl of hot chocolate into a larger bowl which contains cold water and ice.
Just keep stirring until the required temperature of 82˚F (28˚C) is achieved.
You must of course pay particular attention to the sides of the inner bowl as chocolate will begin to set there first. Scrape and stir until a homogenous mass results.
Then as with the other techniques, follow the instructions below on how to raise chocolate’s temperature to temper it.
From 82˚F (28˚C) carefully re-heat the chocolate to 86 – 88 ˚F (30 – 31 ˚C).
The best way of doing so is by putting the pan back on the heat for no more than 5 seconds at a time. After the first 5 seconds take off the heat and stir until the temperature is evenly dispersed, re-check the temperature of the chocolate. If not yet at 86 – 88 ˚F (30 – 31 ˚C), another 5 seconds onto the heat. Continue this process stirring well until your chocolate is at the required temperature.
This technique should only take a very short time to raise the chocolate’s temperature so be careful you do not overheat through leaving the pan on the heat source for too long, or too many 5 seconds. It should only take a couple to achieve the required temperature. Keep stirring though until this temperature is reached.
Use this technique to warm the chocolate for all of the cooling methods shown here. You will have chocolate couverture which is correctly tempered, and ready to use.
Try to keep the temperature to no more than 91˚F (33˚C) while you use it as it will be liquid enough to give a thin covering, and remain tempered. If the chocolate cools too much and begins to thicken place the bowl back on the hot water for a few seconds to warm slightly.
Do not take the chocolate above 95˚F (35˚C) or you will have to begin the tempering process again. Unwanted fat crystals will start to form!
Remember, by taking the chocolate to a temperature above the melting point of Beta (type VI), all fat types will be melted, but not all will be wanted, as only Beta (type V) are the fat crystals we want These fat crystals give chocolate gloss, snap, and flavour.
The temperature must come down quickly to below where the next crystals form 82˚F (28˚C). Then taken back up slowly to a working temperature of between 86 – 88 ˚F (30 – 31 ˚C)
It is just personal preference which method you use for tempering the chocolate, grating, tabling, seeding, stirring? Try them all before choosing the right working method for you.
You can purchase a chocolate thermometer but this is not absolutely necessary unless you intend to temper chocolate frequently. I favour an instant read digital thermometer with a probe so that I can read the temperature at the centre of the chocolate and use it for other confectionary work, and baking.
Shop bought bars of chocolate are already tempered otherwise they would be soft and would not keep well. If you heat this chocolate very slowly to 86 – 88 ˚F (30 – 31 ˚C). , you can keep the temper, and use it.
Under no circumstances must water, even a single drop, get into the chocolate. It will immediately change the texture of the chocolate becoming ‘fudge-like’. As far as tempering goes, it will be ruined!
Do not throw it away though. You could add cream and turn it into Ganache for truffles. It can be used to make chocolate sauce too, or baked as a flavouring in a cake, or, in butter cream. Yummy!